Sunday, September 25, 2011
It's a Tablecloth No More!
My sister-in-law is currently taking a Dress & Humanities class in college and one assignment she had recently was to make a skirt out of a round tablecloth. I found this quite ingenious and had to make one for myself! It's so hard for me to find a cute skirt for a decent price that fits just right. If you're the same way, then you'll like this tutorial :) All you have to do is cut a hole for your waist, sew on some biased tape, and add a zipper! Seriously one of the easiest things I've made. Warning: this project does contain math :)
Materials needed:
Round tablecloth 70-90in.
Scissors
Biased tape
Ruler
Zipper
Step 1:
Measure your waist where you want the skirt to sit. Then take that number and divide by 3.14; then divide again by 2. This will give you the radius for your circle. Mine was 7.9".
Step 2:
Fold your tablecloth in half across the center. Now fold it in half again, from the point to the edge. Do this once more and pin like crazy so it doesn't move. It should look like the image below.
Step 3:
Measure your radius (7.9") from the point and make several marks.
Step 4:
Cut the point along this line.
Step 5:
Now, measure 7" down one edge to create a slit for the zipper.
Ste 6:
Sew a zigzag around the edge so it doesn't stretch out while you sew on the biased tape. Don't stretch it as you sew the zigzag because the circle is cut on the biased somewhere and could stretch out.
Step 7:
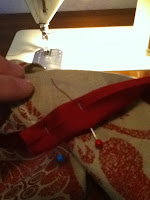
Once you've sewn around the edge, pin on and sew your biased tape.
Step 8:
Add your zipper.
And you’re done! Now you can twirl to your hearts content :)
Saturday, September 24, 2011
Pretty as a Princess: Tutu Tutotrial!
Pumpkin's 1st birthday is coming up in a month and we are going to have her pictures taken. I have taken it upon myself to make her birthday outfit. I wanted to put her in an orange tutu for the pictures and found them to be quite pricey for so small an article of clothing. Like most everything else, I thought, "Hey! I could make one!" And made one, I have. I found instructions for it online, but later changed how I made it because I discovered an easier way :)
Materials needed:
1 1/2-2 yards of tulle (depending on how full you want the tutu to be)
1 spool of 1" satin ribbon
Measure waist of child and from hip to wherever you want the ends of the tulle strips to reach i.e. hip to knee
Step 1:
Fold tulle lengthwise in half and then fold lengthwise in half again so you have 4 layers of tulle.
Step 2:
Cut roughly 4" strips all the way down to the end of the length of tulle.
Step 3:
Cut down middle of first fold.
(optional):
Cut ends of folded tulle strips to the length you desire i.e. the measurement you took from hip to knee.
Step 4:
Lay out ribbon and tie on a strip of tulle where you want the tulle to end so the ribbon can be used to tie onto the child's waist. Tie a knot right next to the tulle so it won't move to the end of the ribbon when you put the rest of the strips on. To tie on strips of tulle, keep folded in half and place behind ribbon. Then pull the ends of the tulle through the loop created by the fold. Repeat with more strips until desired fullness has been achieved.
Step 5:
When finished tying on strips, spread the strips out evenly to reach the waist measurement and then tie another knot next to the tulle so it won't move to the end of the ribbon once the ribbon is cut.
Step 6:
Tie a bow and cut ribbon. Melt the edges so the ribbon doesn't fray.
Step 7:
Place around child's waist and enjoy your little princess :)
Saturday, September 3, 2011
Long Time, No Blog Post
I'm truly sorry it's taken me so long to post another project (or two) on here. I've been really busy with work and my almost-1-year-old daughter takes up A LOT of my time. I rarely have time for crafting anymore. But, alas, I do have some pictures to post of two similar projects I've made over the last couple months.
Remember a while ago when I posted a 'mystery project'? Well, here it is:
Carseat Cover and Diapey Wipey #1 was made for my friend and former Dick's Market co-worker, Sheryl. She is having a little girl, Emma, in about a week and a half. I was so excited to make this for her and it was a bit time consuming (especially the Diapey Wipey), but only because I didn't know what I was doing. I was given a carseat cover from my aunt Jeanette when I was pregnant with Pumpkin so I just used mine as a reference. I must say, this turned out way cuter than I thought it would. What can I say? I'm talented!
Carseat Cover and Diapey Wipey #2 was made for some friends of ours that are having their second baby. They are having another boy in November and I wanted to make something special for them. Kaylee was so sweet and spent so much time and money on a gift for Dadoo and I, so I splurged on fabric for this cover. I have to admit that this turned out super cute. I really love this one because I love stars and I love paisleys! I just wish it came in pink and green so I could make one for another friend of mine that's having a girl in November!
I plan on making another cover in the next couple weeks or so (if I have the time) and I'll post pictures of it when they become available.
Subscribe to:
Posts (Atom)